Introduction to Weaving
This brief tutorial is meant to provide an introduction to weaving with the Anvil Goods + Sugarhouse Workshop loom kits. Here we'll go over the basic terminology and process of weaving, providing a framework for you to begin your project or teach your child the beginning weaving sequence. In the coming days and weeks, I will also provide instructions for finishing your weaving, and some special projects you can make with your woven fabric.
Supplies:
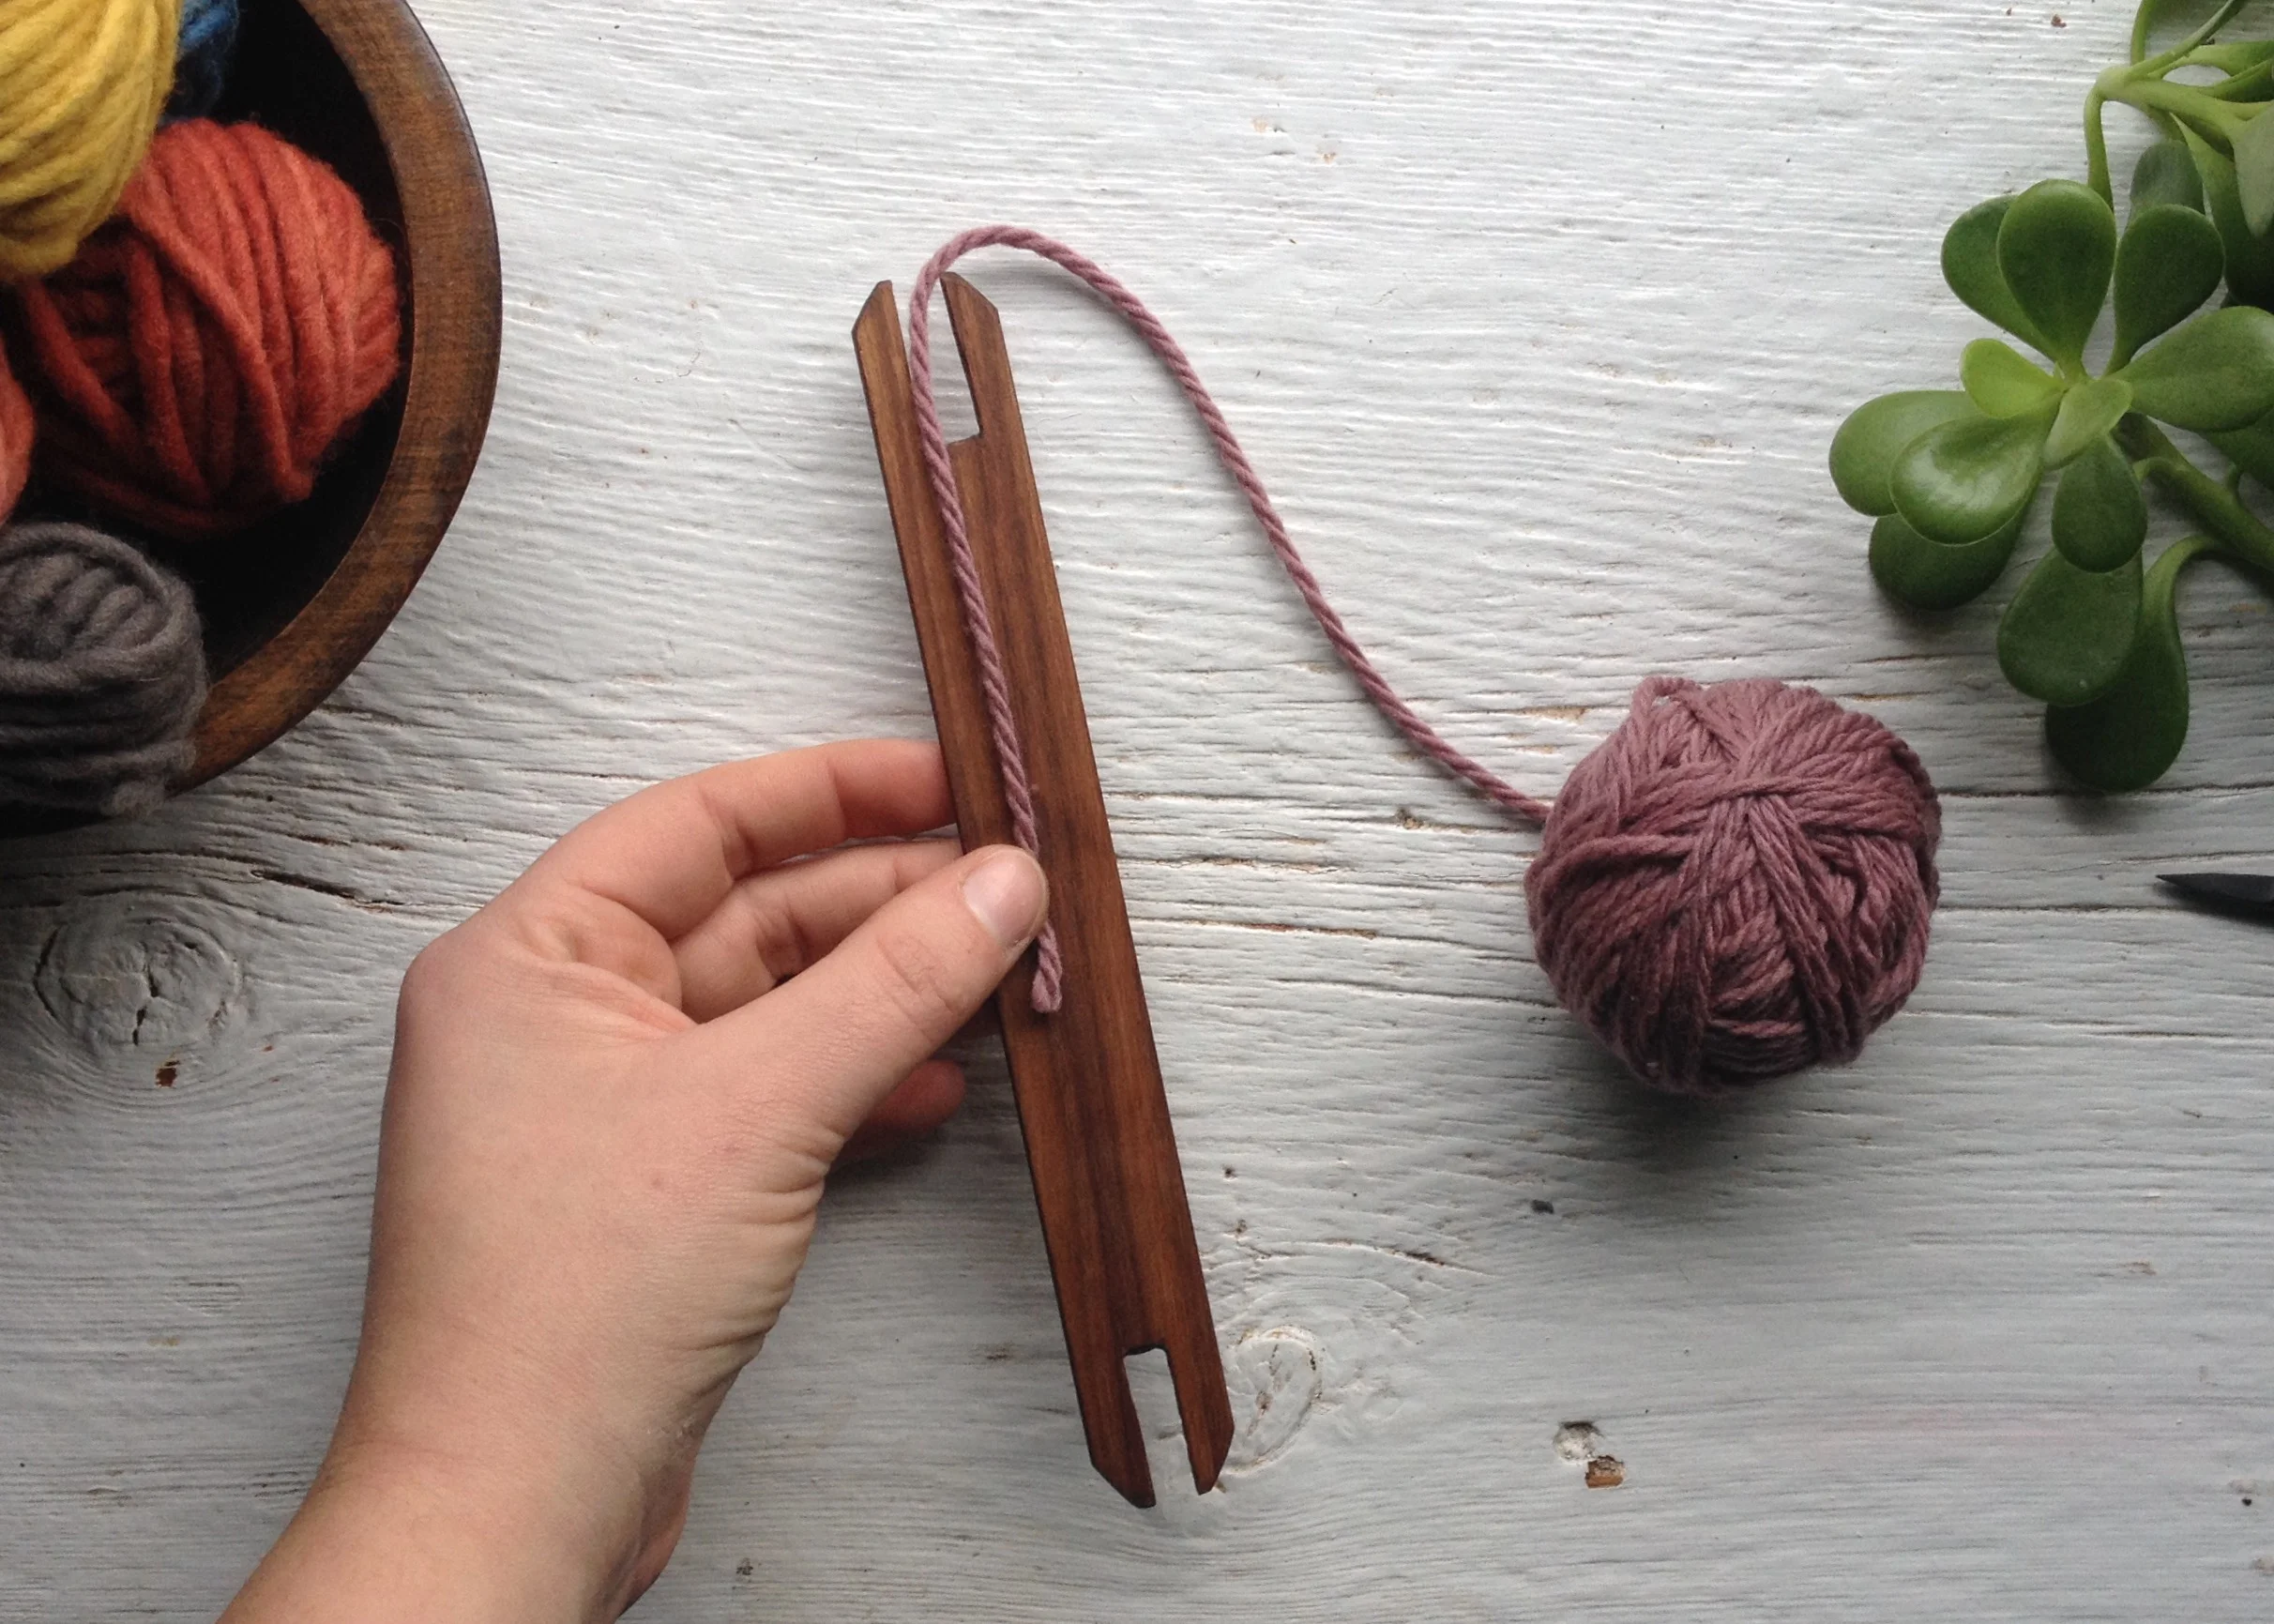
Loom
Shuttle
Yarn
Scissors

Begin by selecting a yarn for your warp. The warp is the yarn that runs vertically in the loom's notches. The weft is the yarn you will use to weave in and out of the warp to create your piece.
Tie a double or triple knot in the end of your warp yarn - large enough that it cannot pull through the notch in the wood.

Begin wrapping the loom by allowing the knot to catch in the first notch in the lower left corner of the loom. Continue wrapping the warp yarn up and down through the pegs until each notch is threaded.

Once you've reached the last notch, you can snip your yarn with a 6" tail, and tie another double or triple knot to fasten the warp to the loom.

Next you will select your first weft yarn, and thread your shuttle to begin weaving. Hold the end of your yarn to the shuttle as you begin winding it through the notches several times to prepare for weaving.
Once your shuttle is full (it is best not to make it too bulky, as it's more difficult to pull through the warp this way), cut the yarn from the main ball and leave a tail.

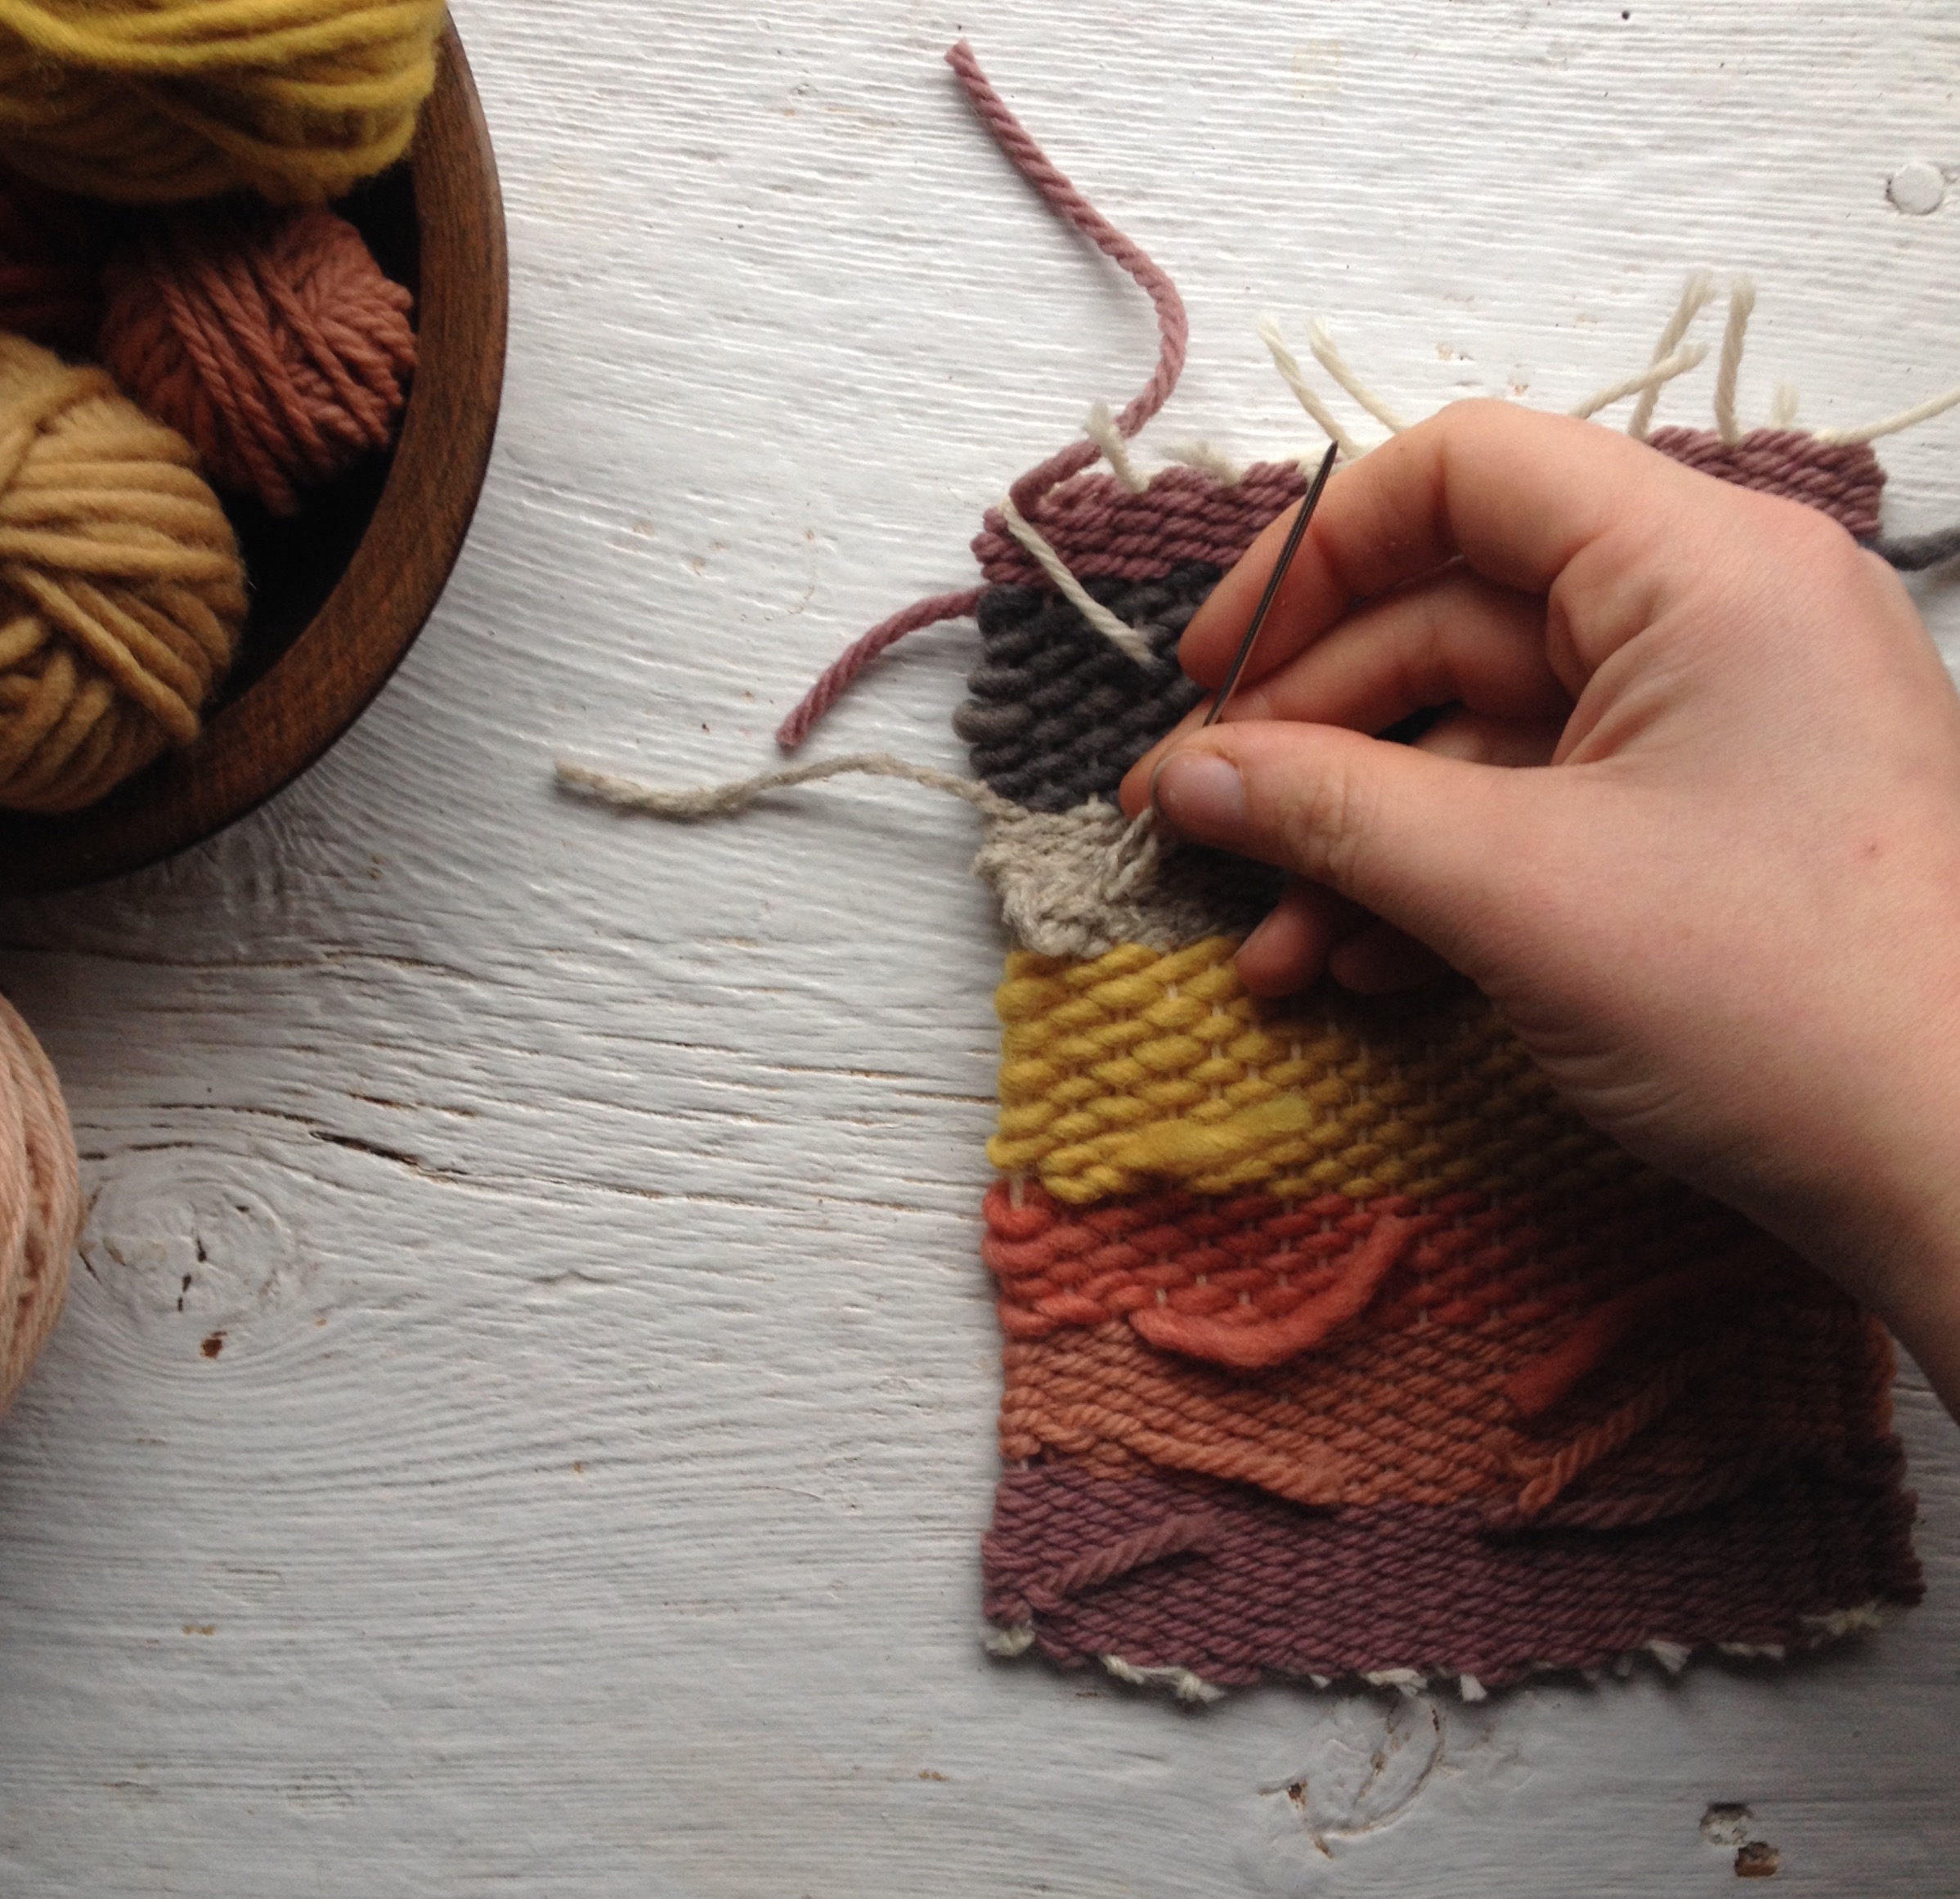
You are now ready to begin weaving! Maintain an over then under progression across the warp, weaving your shuttle from right to left through each thread. For your first row, leave a tail a few inches long at the start where your weft yarn begins.

After your first row is finished, use your fingers to push the weft yarn down evenly along the bottom of the loom. You can now begin moving left to right for the second row.

Continue weaving until you run out of yarn on your shuttle or would like to change colors. Tip: To keep your warp from pulling together in an hourglass shape, pinch the warp and weft together as you pull the yarn through and push it down into place.

When you are finished with a color, leave a tail where you've left off. You can weave this into the back later.

You can begin another color in the same way you began weaving. Wrap your shuttle, begin weaving, and be sure to leave a tail at the start of your new row. You can now weave in this manner changing and switching colors as often as you'd like, until your loom is full or you reach the height you'd like.

FINISHING YOUR WEAVING
Once you're woven up to the top of the loom (or as high as you'd like), you are ready to remove the weaving from the loom and finish your project. Below I will cover the basics of removing your work, weaving loose ends, and a simple way to hang and display your piece.
Supplies:
Your finished weaving on the loom
Scissors
Tapestry needle
Small stick or dowel slightly longer than the width of your weaving (optional)
To remove your work, first gently pull the loops of the warp out from the notches on the top.

After you've removed the warp from the top of the loom, repeat the same on the bottom so that your weaving is now entirely removed from the loom.

Next, you will snip the loops open at the top of your weaving.

You can now tie the strands together with a basic knot to secure the weaving. Be careful not to pull too tightly, as this could cause the weaving to bunch. Leave your strings long at the top to allow for adding the hanger later.

Repeat the process of cutting the loops and tying together at the bottom of your piece. Along the bottom, I like to snip the ends of my knots for a slightly more clean-looking finish. Alternatively, if you had enough excess yarn on the tails of the knots, you could weave the ends in at the back of your piece.

Once both the top and bottom warp is tied off, you can move on to weaving in the ends of your weft yarn along the sides. Using a blunt, large-eyed tapestry needle, thread the first loose end and pull it through a loop at the back of your weaving. Be careful not to pull it through the front loop as well.
Moving up the weaving, weave in each end until there are none still hanging from the sides of your work.

After all ends have been woven into the back of the piece, you can snip off any excess yarn tails.

To display your weaving on the wall, a simple way to do this is with a stick or dowel. It needs only be longer than the width of your weaving, and thin enough to tie your warp yarn around.

Center your stick along the top of the weaving. Begin tying each set of ties along the top around the stick until you reach the other end and the ties are secured all the way across the top.
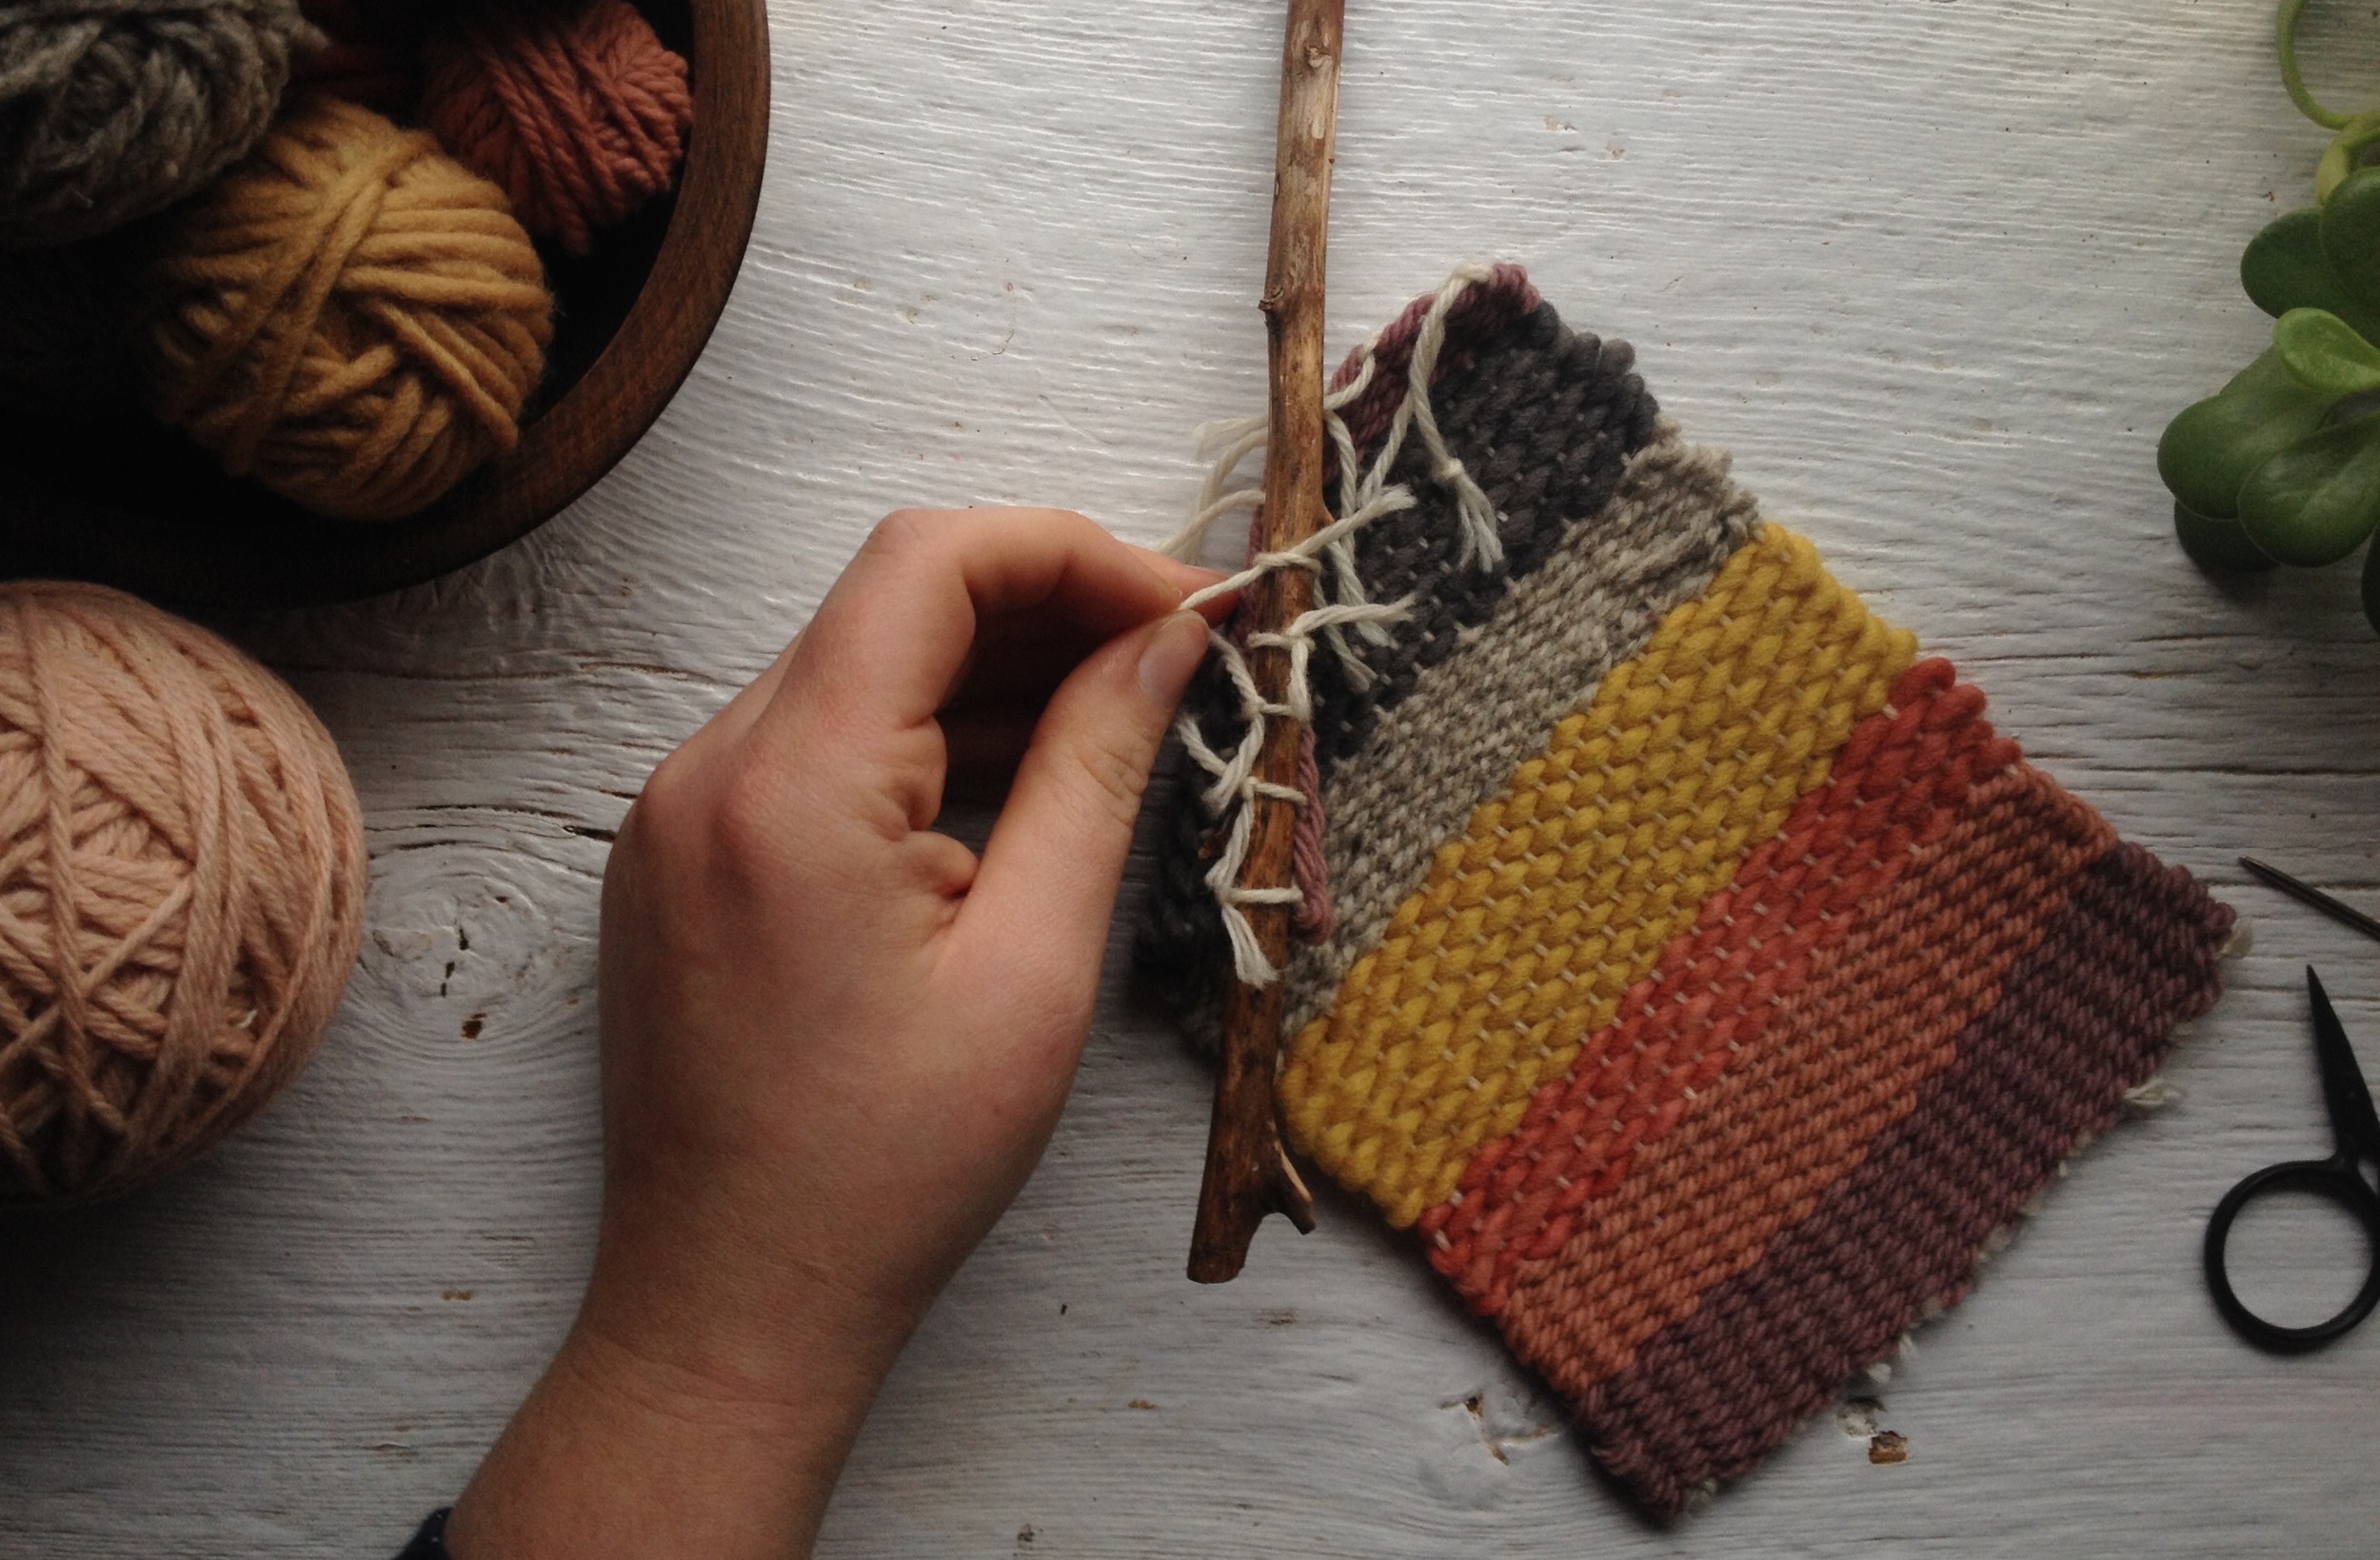
Snip the ends of the ties and push the knots to the back of the stick.
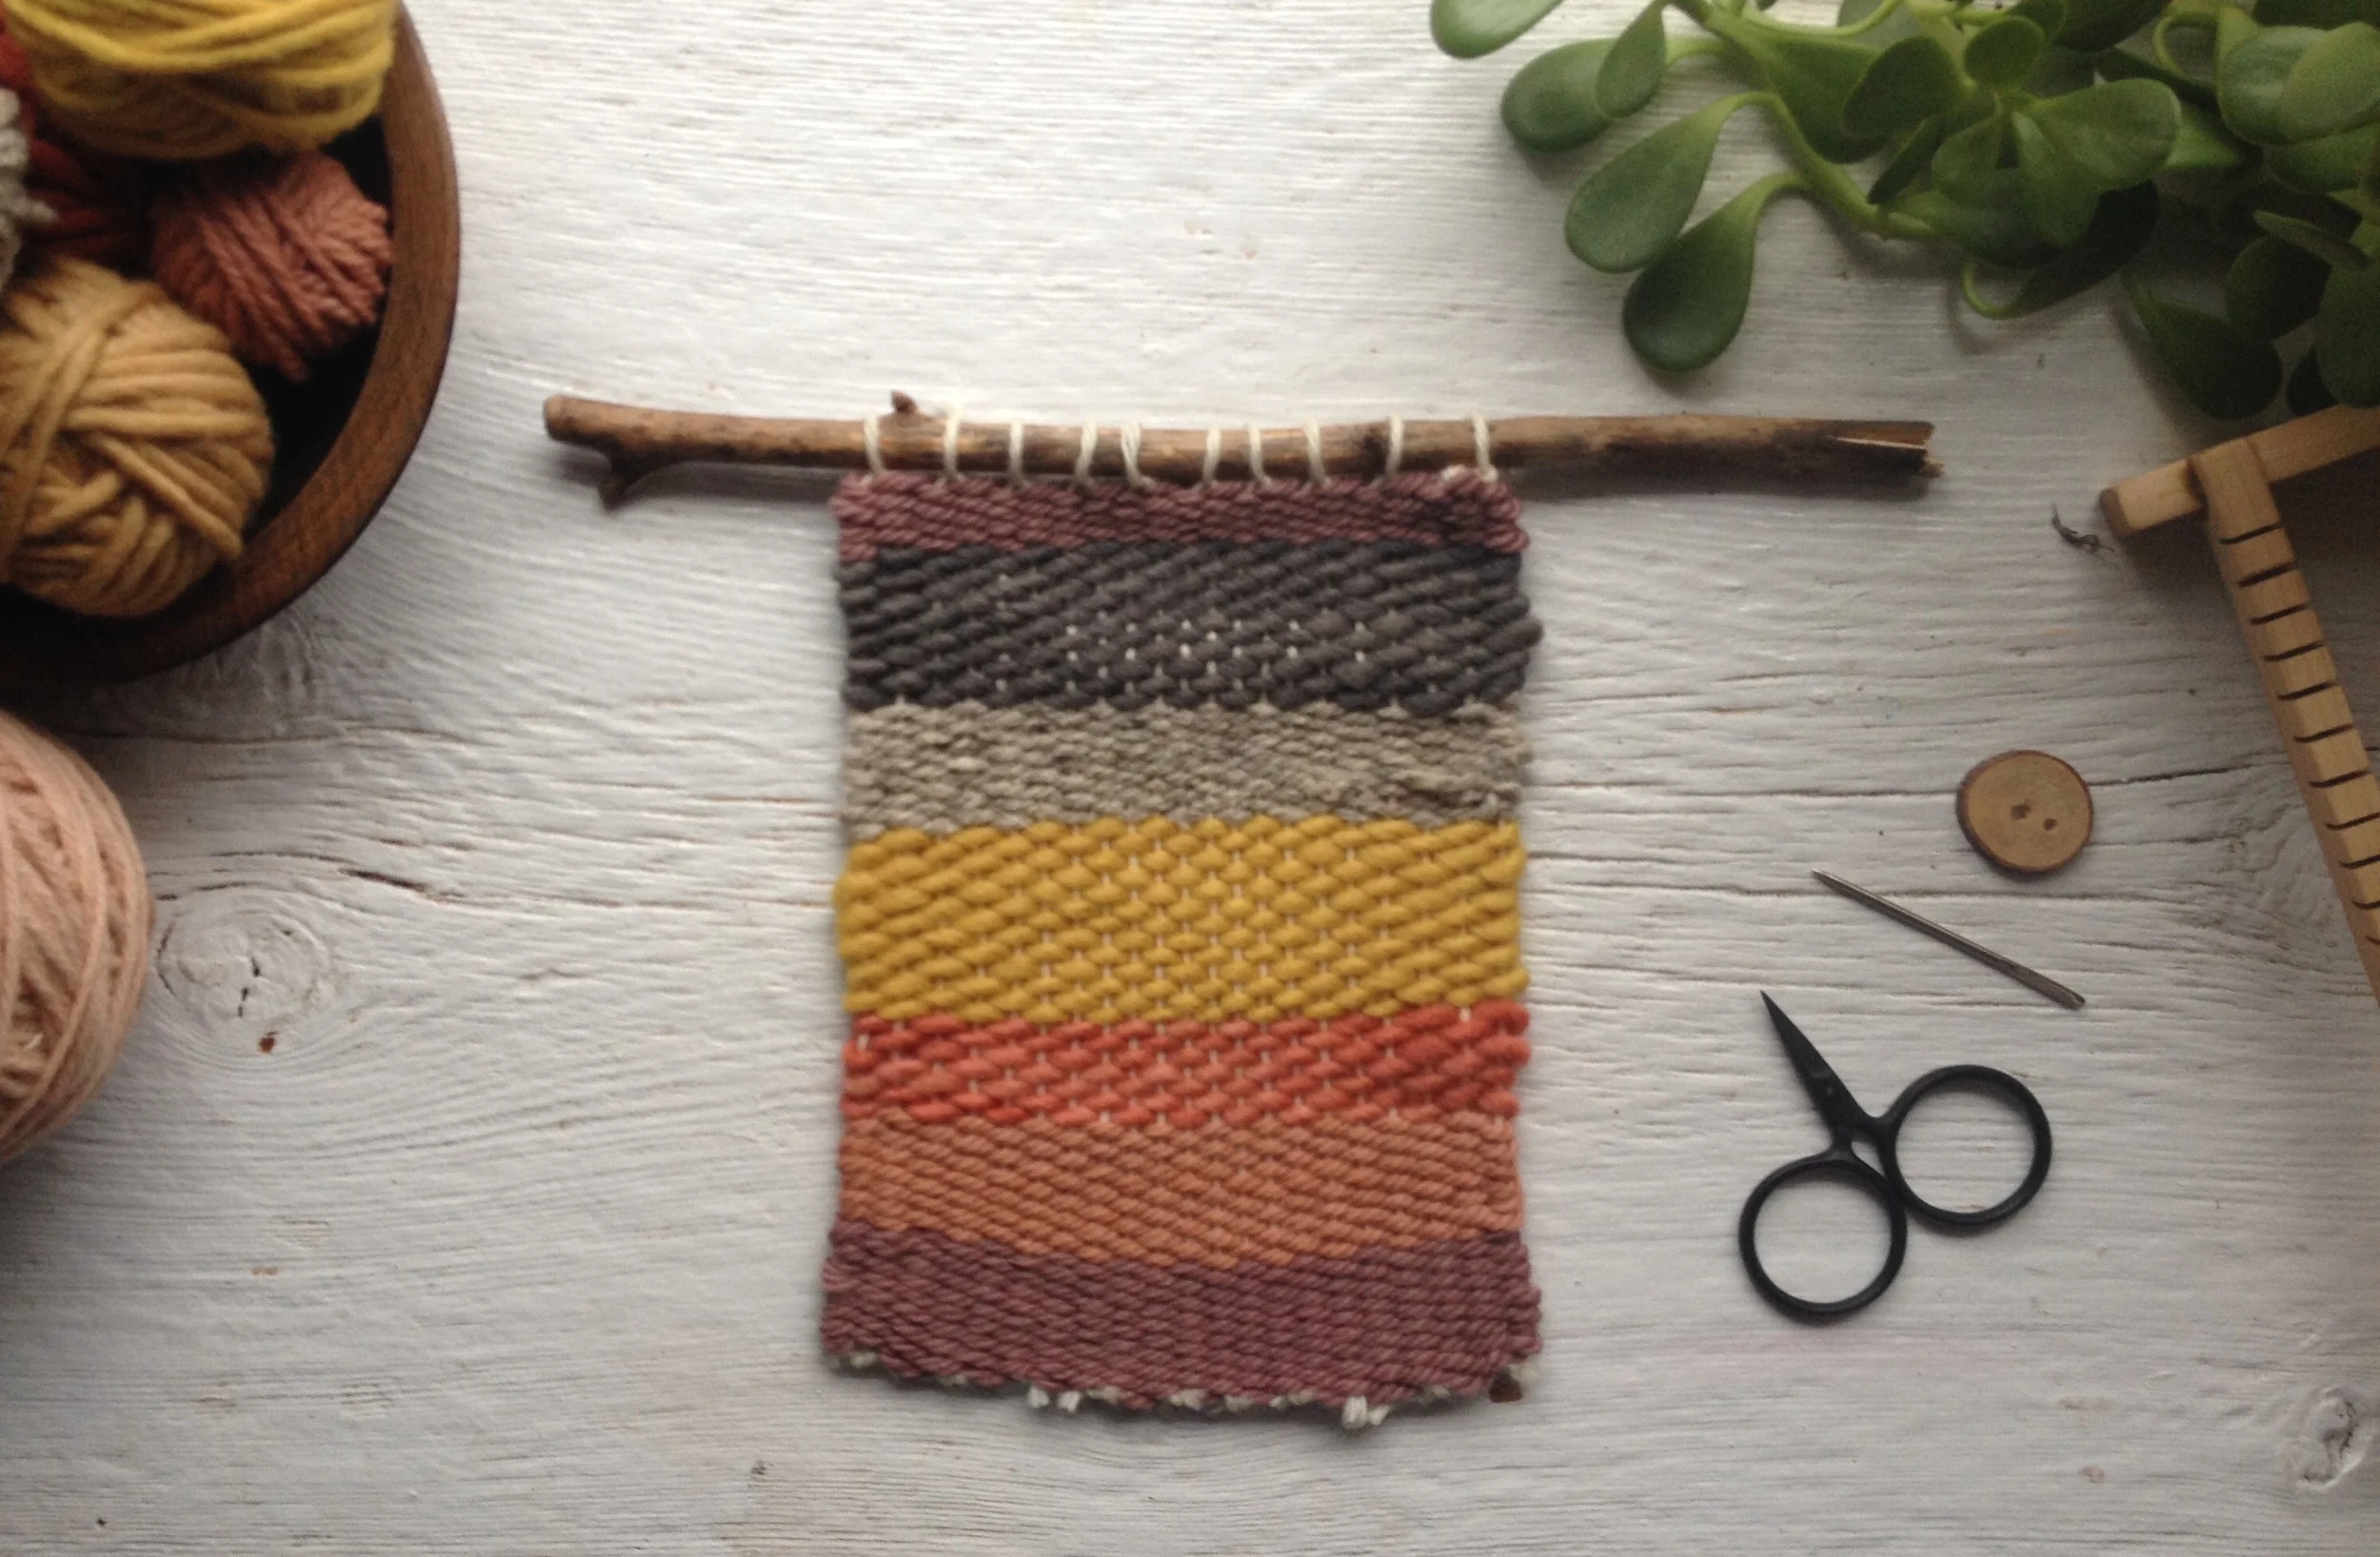
To hang the weaving, add a string of your choice, knotted on each side of the piece. Trim any excess ends, and display proudly!


You've finished your first weaving!